 IoT
IoT 2026 ESP32 Matter Smart Light Bulb Development: Complete Guide from SDK to Network Configuration
Yesterday we discussed the full picture of the Matter protocol - what it is, why it’s important, and how to integrate with major ecosystems. But reading protocol specifications isn’t the same as writing code, right?
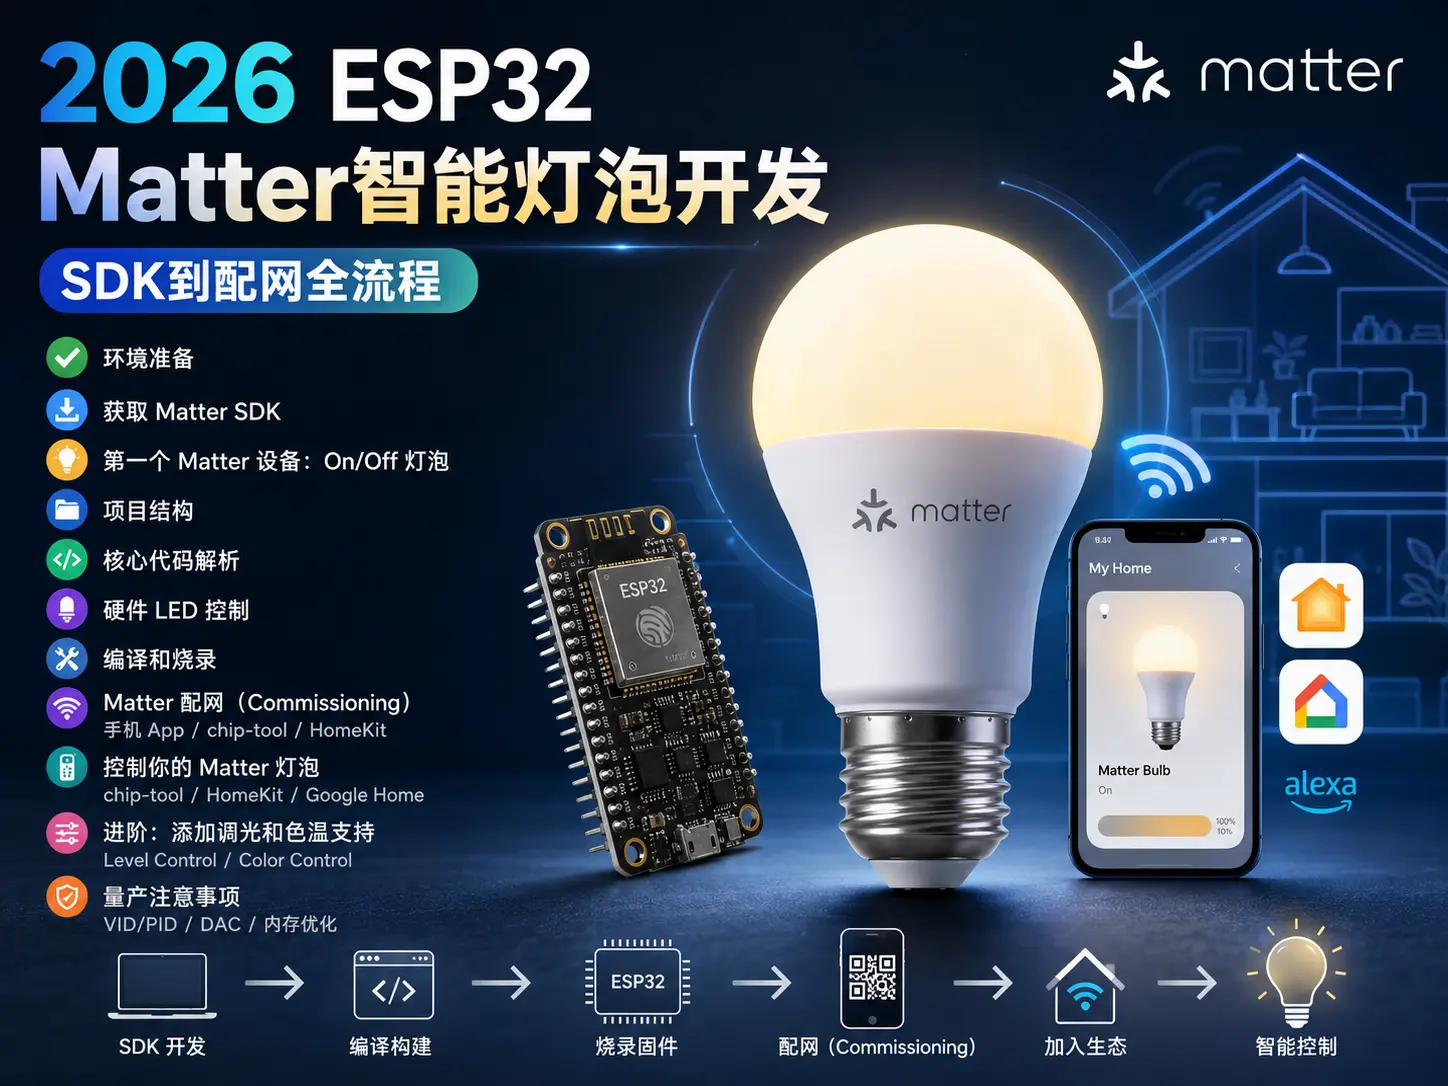
Today, we’re getting hands-on: using an ESP32 development board to implement a Matter protocol smart light bulb. Not a simulation, not a demo toy, but a real Matter device that can be simultaneously controlled by HomeKit, Google Home, and Alexa.
Environment Setup
To develop Matter devices, you need the following toolchain:
- ESP-IDF v5.2+ — Espressif’s official SDK with built-in Matter support
- Connected Home IP (CHIP) SDK — Core implementation of the Matter protocol stack
- Linux or macOS host — Windows works too but configuration is more troublesome
- ESP32-C3 or ESP32-S3 development board — Recommended to use a board with RGB LED for easier debugging
Getting the Matter SDK
Espressif provides a pre-compiled Matter SDK branch, no need to manually pull the CHIP repository:
# Clone Espressif's Matter SDK branch
git clone --recursive https://github.com/espressif/esp-matter.git
cd esp-matter

# Install toolchain (will automatically download ESP-IDF and Matter dependencies)
./install.sh
This process takes about 10-20 minutes, depending on network speed. esp-matter already manages CHIP SDK as a submodule, saving a lot of trouble.
After installation, activate the environment:
. ./export.shFirst Matter Device: On/Off Light Bulb
Project Structure
esp-matter provides an out-of-the-box light example:
esp-matter/examples/light/
├── CMakeLists.txt          # Project build configuration
├── sdkconfig.defaults      # Matter default configuration
├── main/
│   ├── CMakeLists.txt
│   └── app_main.cpp        # Entry code
Core Code Analysis
Let’s look at the key parts in app_main.cpp:
#include <esp_matter.h>
#include <esp_matter_cluster.h>
#include <esp_matter_endpoint.h>
#include <esp_log.h>
#include <app/server/Server.h>

using namespace esp_matter;
using namespace esp_matter::attribute;
using namespace esp_matter::endpoint;

static constexpr const char *TAG = "app_main";

// 1. Initialize Matter protocol stack
extern "C" void app_main()
{
    // Initialize driver
    led_driver_init();

    // Create Matter endpoint
    // Endpoint 0 is the root node, automatically created
    // Endpoint 1 is On/Off Light
    endpoint_t *ep = lightbulb::create(NULL, 0,
        ENDPOINT_FLAG_NONE, NULL);
    if (!ep) {
        ESP_LOGE(TAG, "Matter create endpoint failed");
        return;
    }

    // 2. Configure On/Off cluster attributes
    cluster_t *onoff_cluster = on_off::create(ep,
        CLUSTER_FLAG_SERVER, NULL);

    // Set device name
    cluster_t *basic_cluster = cluster::get(ep,
        chip::EndpointId(0), chip::Clusters::BasicInformation::Id);
    update(basic_cluster, basic_information::Attributes::NodeLabel::Id,
        ESP_MATTER_CHAR_STR("Matter Lightbulb"));

    // 3. Start Matter protocol stack
    config_t matter_config = {
        .vendor_id = 0xFFF1,  // Test vendor ID
        .product_id = 0x8001,  // Test product ID
        .device_version = 1,
        .setup_passcode = 12345678,  // Network configuration pairing code
        .setup_discriminator = 3840,
    };

    controller::start(&matter_config);
    client::start();

    ESP_LOGI(TAG, "Matter Light started");
}
The core logic of this code has only three steps:
- Create endpoint — Use
lightbulb::create()to create an On/Off Light endpoint - Bind cluster — Add
on_offcluster (on/off control) - Start protocol stack — Call
controller::start()to broadcast Matter service
Hardware LED Control
In actual projects, you need an LED driver. Here we use simple GPIO control:
// lightbulb_driver.h
#pragma once

#define LED_PIN GPIO_NUM_8

void led_driver_init(void)
{
    gpio_config_t io_conf = {
        .pin_bit_mask = (1ULL << LED_PIN),
        .mode = GPIO_MODE_OUTPUT,
        .pull_up_en = GPIO_PULLUP_DISABLE,
        .pull_down_en = GPIO_PULLDOWN_DISABLE,
        .intr_type = GPIO_INTR_DISABLE,
    };
    gpio_config(&io_conf);
    gpio_set_level(LED_PIN, 0);  // Default off
}

// Matter callback: called when On/Off state changes
void app_driver_on_off_update(bool state)
{
    gpio_set_level(LED_PIN, state ? 1 : 0);
    ESP_LOGI(TAG, "Light %s", state ? "ON" : "OFF");
}
Compilation and Flashing
# Enter light example directory
cd examples/light

# Configure target chip (ESP32-C3 or ESP32-S3)
idf.py set-target esp32c3

# Compile
idf.py build

# Flash (replace /dev/ttyUSB0 with your serial port)
idf.py -p /dev/ttyUSB0 flash monitor
After successful flashing, the serial port will output information similar to this:
I (1234) app_main: Matter Light started
I (1345) CHIP: Matter server started
I (1456) CHIP-SV: BLE listening for commissioning
This means the device has entered network configuration waiting mode, BLE broadcast is active and waiting for commissioner connection.
Matter Commissioning
This is the key step to get Matter devices online. There are three ways to commission:
Method 1: Using ESP Matter Mobile App (Simplest)
Espressif provides an official commissioning tool:
- Install ESP Matter Commissioning Tool on your phone (Android/iOS)
- Open the App, scan the QR code on the device (or manually enter the commissioning code)
- App automatically connects to the device via BLE, sends WiFi credentials
- After device connects to WiFi, Matter service broadcasts via mDNS
- Commissioning complete ✅
Method 2: Using chip-tool Command Line
If you’re more comfortable with the command line, you can use chip-tool:
# Compile chip-tool
cd esp-matter/connectedhomeip/connectedhomeip
./scripts/examples/gn_build_example.sh \
  examples/chip-tool/ out/chip-tool

# Commission via BLE
./out/chip-tool pairing ble-wifi 0x1 \
  "YourWiFiName" "WiFiPassword" \
  12345678 3840
After successful commissioning, the device will be assigned a Node ID (e.g., 0x0000000000000002), and then it can be controlled via IP.
Method 3: HomeKit Commissioning
If your ESP32 firmware includes HomeKit support (needs to enable CONFIG_ESP_MATTER_HOMEKIT_ENABLE=y in sdkconfig), you can directly use iPhone’s “Home” App for commissioning:
- Open “Home” App → Add Accessory
- Scan Matter QR code
- Device automatically joins HomeKit, no additional bridge needed
Control Your Matter Light Bulb
After commissioning is complete, you have multiple ways to control it:
Using chip-tool Control
# Turn on light
./out/chip-tool onoff on 0x1 0x1

# Turn off light
./out/chip-tool onoff off 0x1 0x1

# Query status
./out/chip-tool onoff read on-off 0x1 0x1
Using HomeKit Control
In iPhone’s “Home” App, it will appear as a regular HomeKit light bulb - on/off, Siri voice, automation all available.
Using Google Home Control
Google Home also natively supports Matter On/Off Light devices, no additional integration needed.
Advanced: Adding Dimming and Color Temperature Support
On/Off light bulb is just the beginning. Real smart light bulbs usually support dimming and color temperature.
Adding Level Control (Dimming)
Add level_control cluster to the endpoint:
// Add dimming cluster
cluster_t *level_cluster = level_control::create(ep,
    CLUSTER_FLAG_SERVER, NULL);

// Set default brightness (0-254)
update(level_cluster,
    level_control::Attributes::CurrentLevel::Id,
    ESP_MATTER_UINT8(127));  // About 50% brightness
Adding Color Control (Color Temperature)
// Add color temperature control cluster
cluster_t *color_cluster = color_control::create(ep,
    CLUSTER_FLAG_SERVER, NULL);

// Set color temperature range (Mired units)
update(color_cluster,
    color_control::Attributes::ColorTemperatureMireds::Id,
    ESP_MATTER_UINT16(2700));  // Warm white light
After adding these clusters, your device type needs to upgrade from ON_OFF_LIGHT to DIMMABLE_LIGHT or COLOR_TEMPERATURE_LIGHT. Matter specification has clear cluster requirements for each device type.
Mass Production Considerations
If you plan to turn this project into a product, there are a few pitfalls to know in advance:
1. Vendor ID and Product ID
The example code uses 0xFFF1 which is a CSA reserved ID for testing, cannot be used for commercial products.
Official version requires:
- Apply for Vendor ID from CSA (Connectivity Standards Alliance)
- Annual fee about $7,000 (discounts for non-profit organizations)
- Each product assigned an independent Product ID
2. DAC (Device Attestation Certificate)
Matter devices need DAC (Device Attestation Certificate) to be trusted by ecosystem platforms:
- PAA (Product Attestation Authority) — Root certificate, issued by CSA
- PAI (Product Attestation Intermediate) — Manufacturer intermediate certificate
- DAC (Device Attestation Certificate) — Unique for each device
Espressif provides test DACs, but for mass production you need to build your own PAI/DAC issuance process.
3. Memory Usage
Matter protocol stack on ESP32 occupies approximately:
- Flash: ~1.2MB (including protocol stack and application)
- RAM: ~150KB (runtime)
ESP32-C3 (4MB Flash / 400KB RAM) is the minimum viable configuration, recommended ESP32-S3 (8MB Flash / 512KB PSRAM).
Summary
The process of implementing Matter devices with ESP32 is actually quite straightforward:
- Set up esp-matter development environment — One-click installation script
- Create endpoints and clusters — Use official API to define device capabilities
- Compile and flash — Standard ESP-IDF process
- Commission online — BLE + WiFi credential injection
- Ecosystem integration — Native support for HomeKit/Google Home/Alexa
No bridge needed, no cloud service relay, no need to write adaptation code for each platform - one firmware, all ecosystems compatible. This is the value of Matter.
Next article, we’ll dive deep into Matter’s security mechanisms - device authentication, DAC certificate chain, and how to manage certificates in mass production. If you have questions about device authentication, see you in the comments.