 ESP32
ESP32 ESP32-C3 Pinout Quick Reference: GPIO/UART/ADC Lookup Table (2026 Practical Edition)
Introduction to the ESP32-C3
The ESP32-C3 is a low-cost MCU module developed by Espressif that meets typical IoT product requirements while significantly improving security. Priced similarly to the ESP8266, the ESP32-C3 delivers notably better performance. Key design features include:
-
Select GPIOs support RTC functionality, enabling wake-up from deep-sleep low-power modes
-
Configurable analog features include ADC (Analog-to-Digital Conversion) for reading analog sensor data
-
Certain pins support capacitive touch sensing, replacing physical buttons for touch-based interaction
Pinout and Schematics
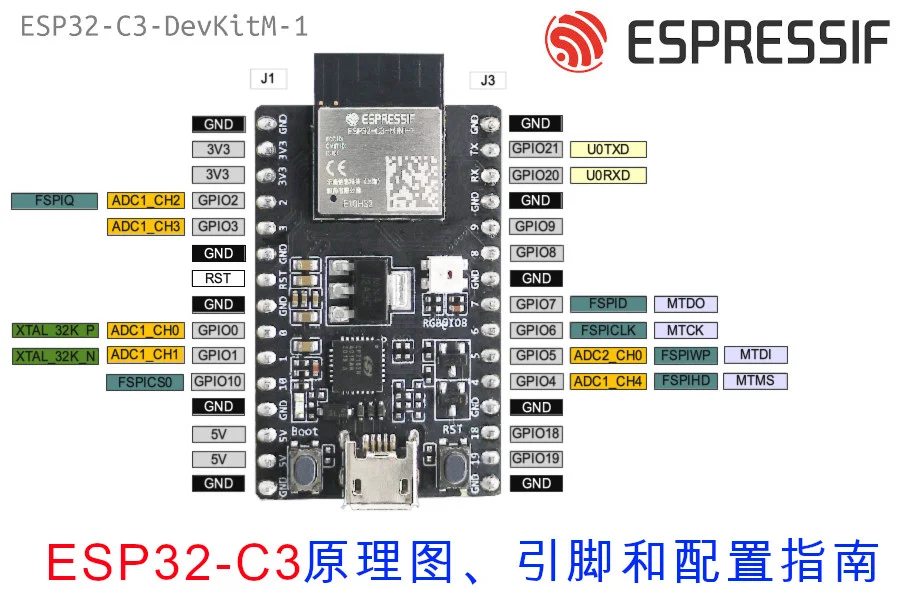
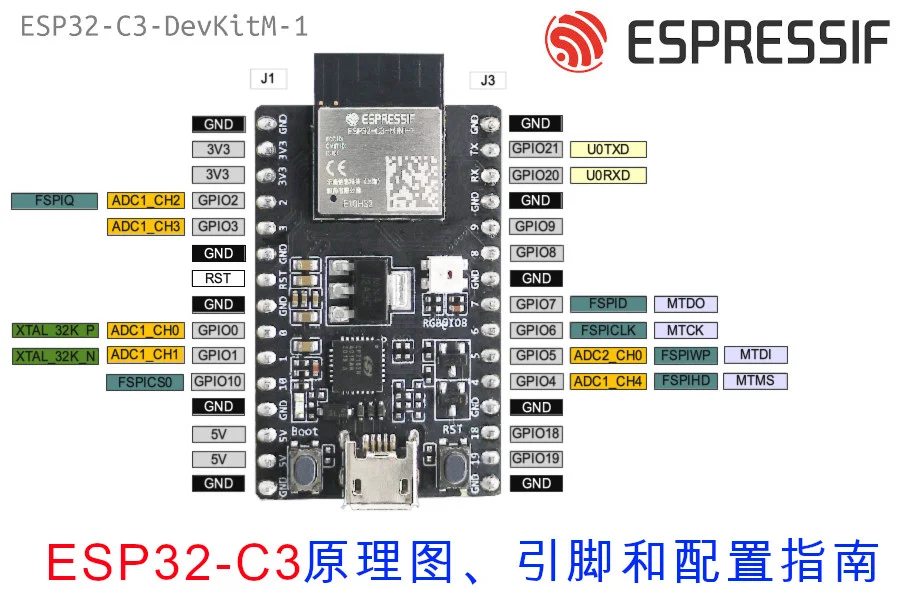
ESP32-C3-DevKitM Pin Layout
As the module is still relatively new, prices haven’t dropped much yet. On Espressif’s official Taobao store it sells for ¥60, plus ¥15 shipping — bringing the total cost to ¥75.
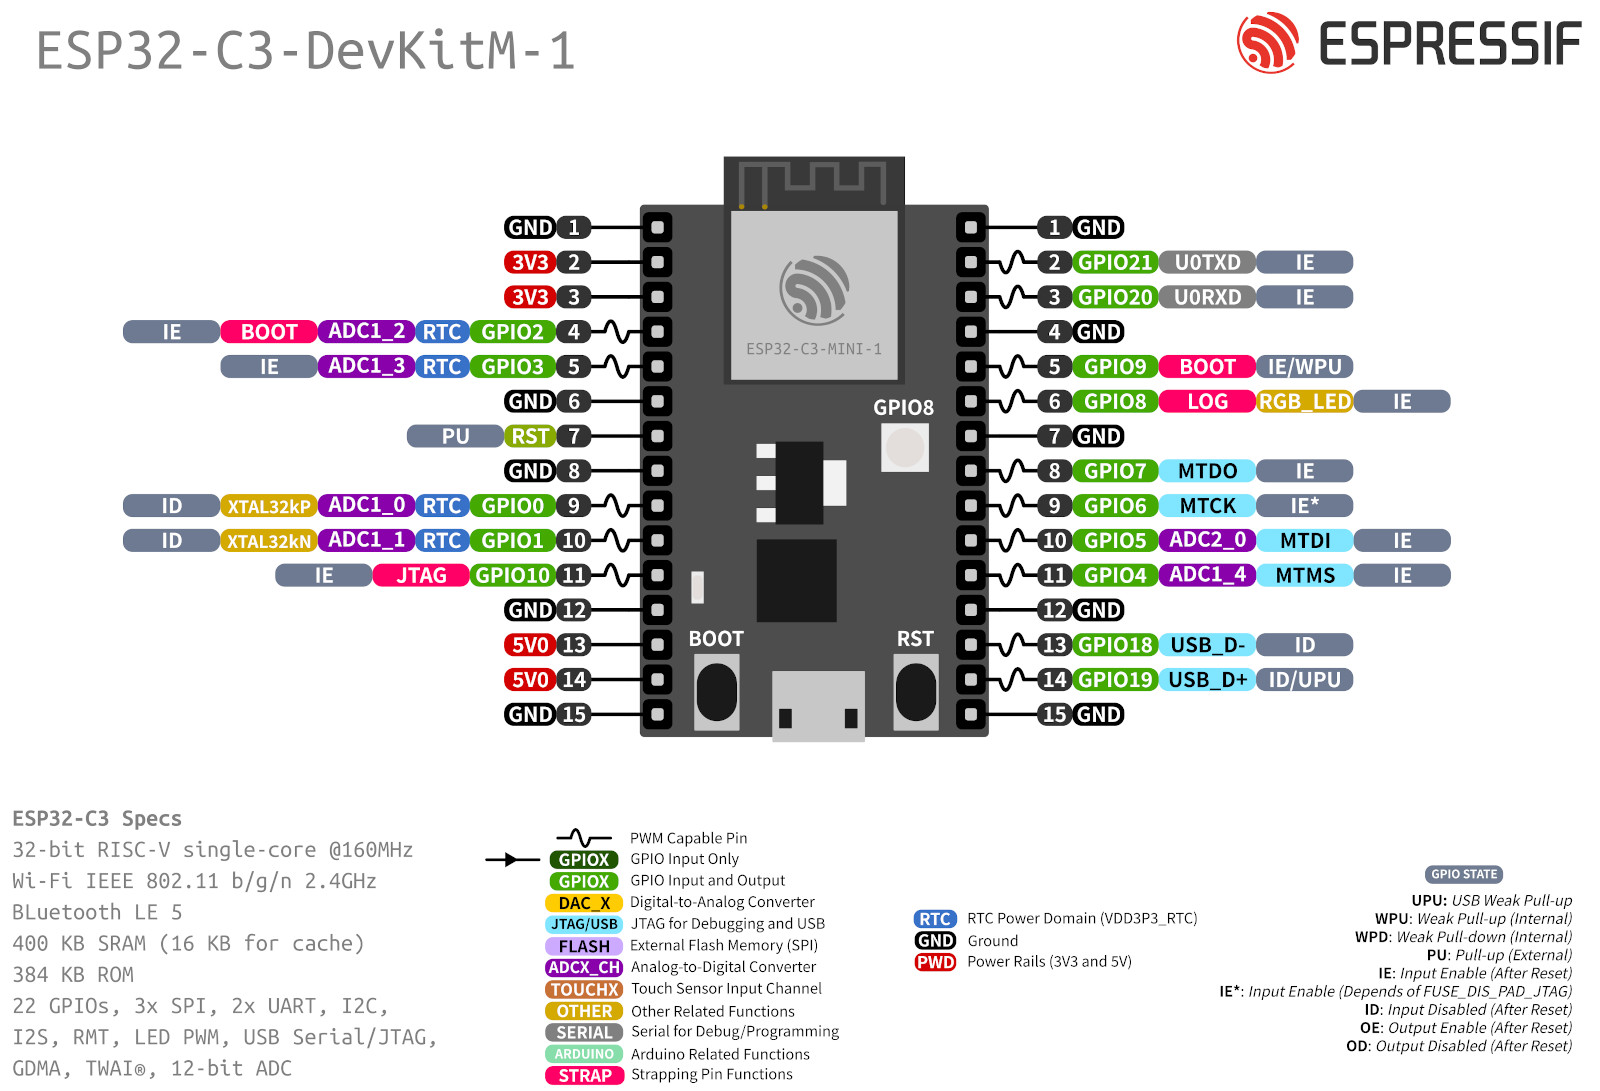 Here is the dev board schematic
Pin Table
.pow33v, .pow5v { border: 8px solid red!important; } .i2c { border: 8px solid #fc4cfc!important; } .i2s { border: 8px solid #63c9cb!important; } .uart { border: 8px solid gray!important; } .spi { border: 8px solid #343ffb!important; } .gnd { background-color: black!important; line-height: 19px; border: 8px solid yellow!important; color: #ffffff; } .pin { background-color: white; width: 35px; height: 35px; line-height: 17px; position: relative; border: 8px solid green; border-radius: 100%; text-align: center; margin: 0px auto; } .pow33v-bg, .pow5v-bg{ background-color: red !important; color: white !important; } .gnd-bg { background-color: black !important; color: white !important; } .i2c-bg { background-color: #fecdfe !important; } .i2s-bg { background-color: #d0e7f4 !important; } .spi-bg { background-color: #d0e7f4 !important; } .uart-bg { background-color: gray !important; color: white !important; } .i2s-bg { background-color: #d0f7fa !important; } .gpio-bg { background-color: #cefcce !important; } table#pinout { width:100%; text-align: center; } table img { height:250px; } @media only screen and (max-width: 600px) { table td,table th { padding: 0px; } .mobile { display:block; } table#pinout{ display:none; } } @media only screen and (min-width: 601px) { .mobile { display:none; } table#pinout{ display:block; } }
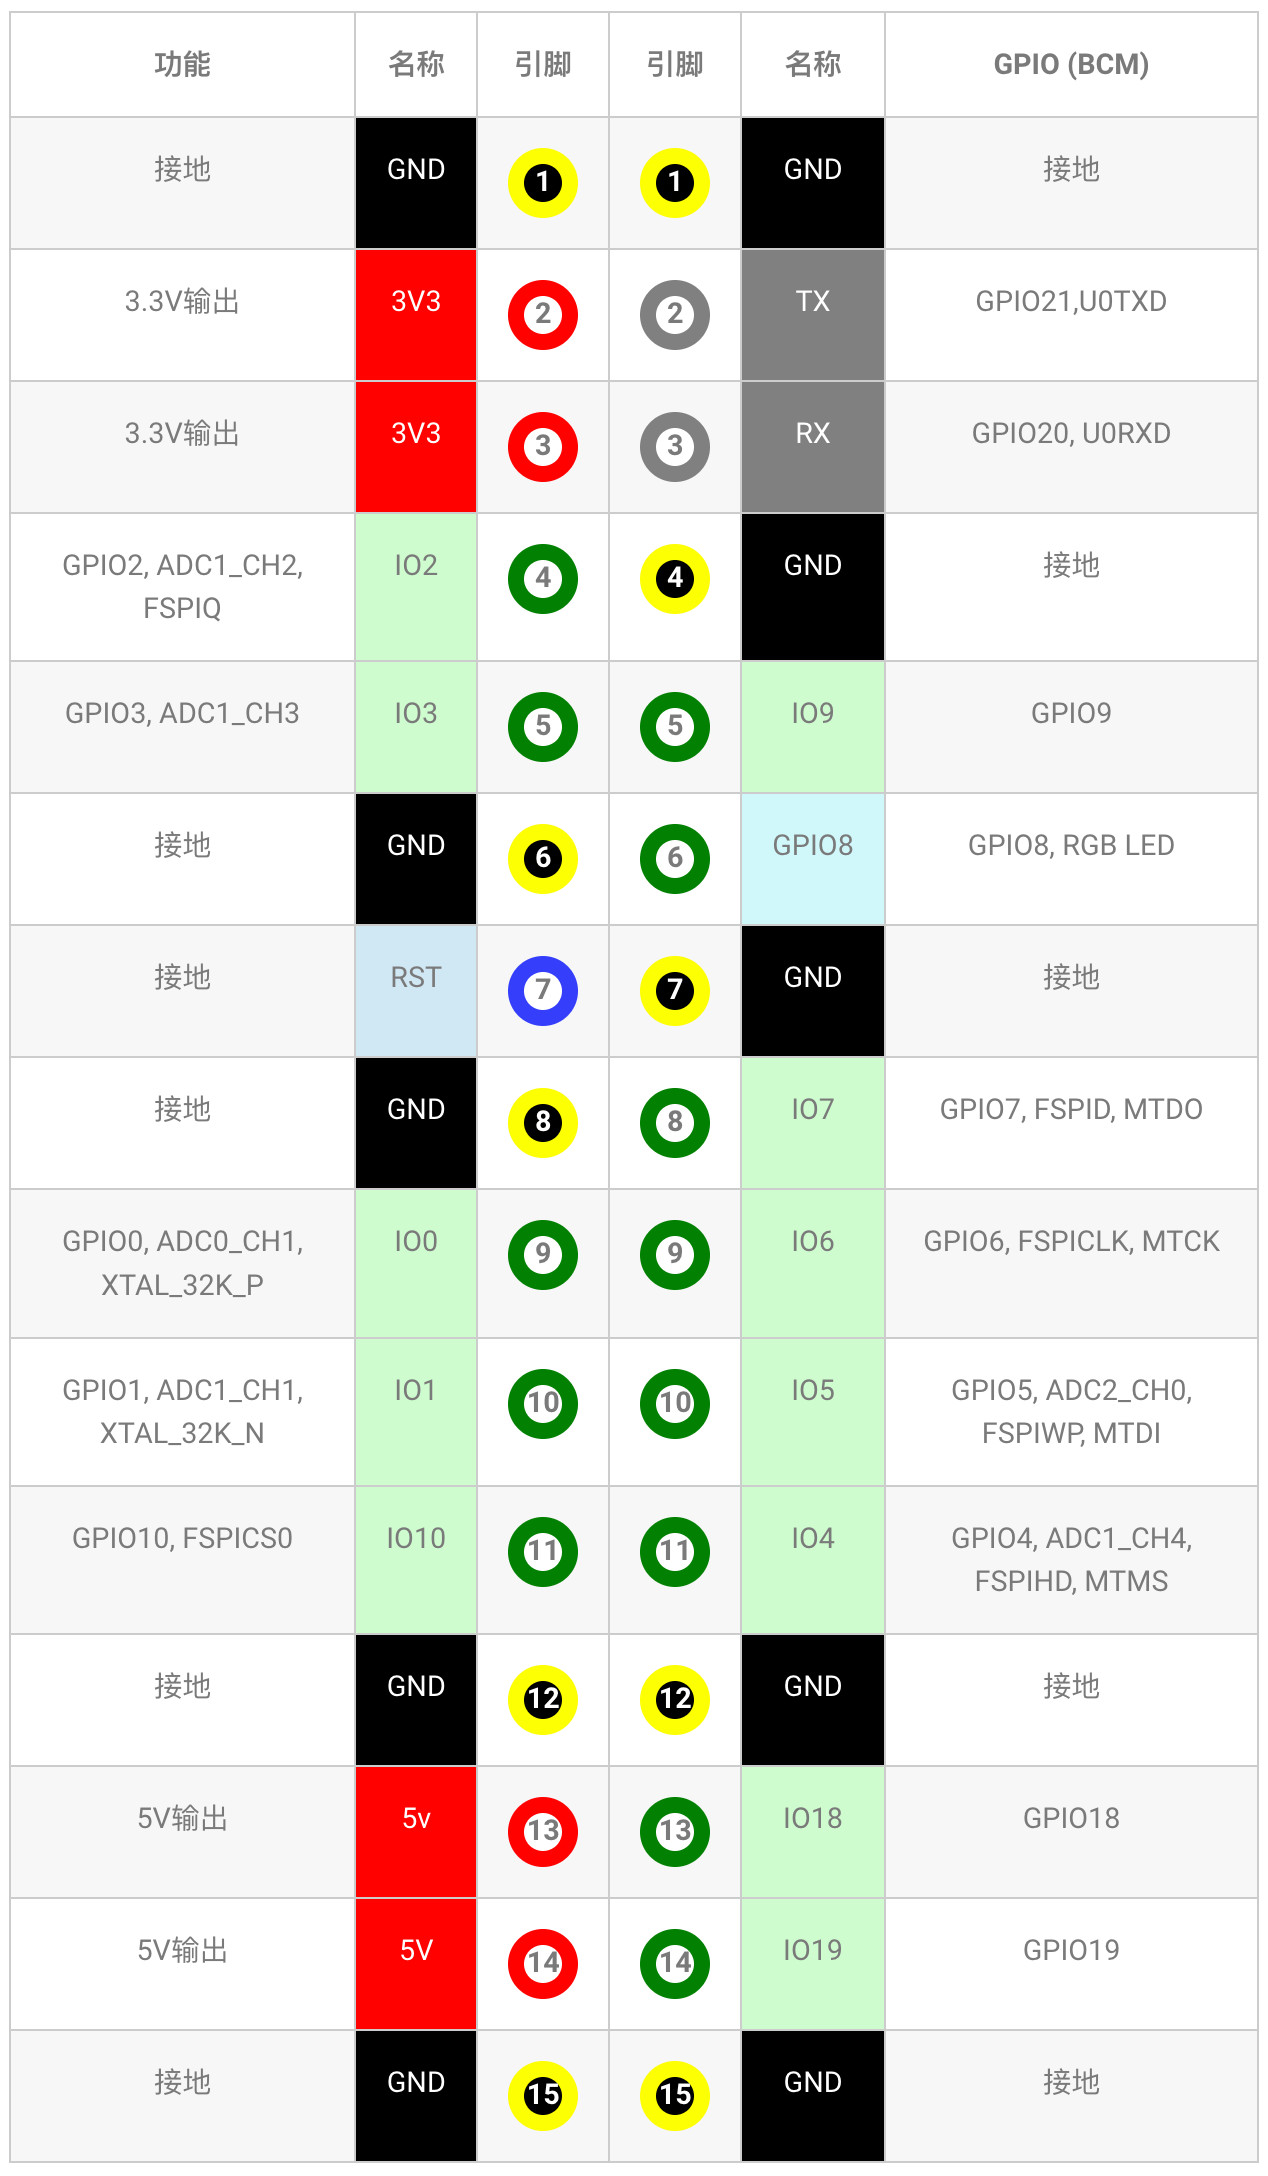
| Function | Name | Pin | Pin | Name | GPIO (BCM) |
|---|---|---|---|---|---|
| Ground | GND | 1 | 1 | GND | Ground |
| 3.3V Output | 3V3 | 2 | 2 | TX | GPIO21, U0TXD |
| 3.3V Output | 3V3 | 3 | 3 | RX | GPIO20, U0RXD |
| GPIO2, ADC1_CH2, FSPIQ | IO2 | 4 | 4 | GND | Ground |
| GPIO3, ADC1_CH3 | IO3 | 5 | 5 | IO9 | GPIO9 |
| Ground | GND | 6 | 6 | GPIO8 | GPIO8, RGB LED |
| Ground | RST | 7 | 7 | GND | Ground |
| Ground | GND | 8 | 8 | IO7 | GPIO7, FSPID, MTDO |
| GPIO0, ADC0_CH1, XTAL_32K_P | IO0 | 9 | 9 | IO6 | GPIO6, FSPICLK, MTCK |
| GPIO1, ADC1_CH1, XTAL_32K_N | IO1 | 10 | 10 | IO5 | GPIO5, ADC2_CH0, FSPIWP, MTDI |
| GPIO10, FSPICS0 | IO10 | 11 | 11 | IO4 | GPIO4, ADC1_CH4, FSPIHD, MTMS |
| Ground | GND | 12 | 12 | GND | Ground |
| 5V Output | 5v | 13 | 13 | IO18 | GPIO18 |
| 5V Output | 5V | 14 | 14 | IO19 | GPIO19 |
| Ground | GND | 15 | 15 | GND | Ground |
Uploading Code
1. Drivers
The ESP32-C3 uses the CH341 serial driver, which is relatively new and not compatible with older ESP32 setups. You’ll need to install the updated driver. Windows Driver Mac Driver
2. Configuring PlatformIO
We use PlatformIO most frequently, so let’s start with its setup. PlatformIO requires modifications to platform and platform_packages to work properly with the ESP32-C3.
platform = https://github.com/tasmota/platform-espressif32/releases/download/v2.0.3rc1/platform-espressif32-2.0.3.zip
board = esp32-c3-devkitm-1
framework = arduino
platform_packages =
framework-arduinoespressif32 @ https://github.com/espressif/arduino-esp32#master
board_build.f_flash = 80000000L
board_build.flash_mode = dio
monitor_speed = 115200
3. Configuring Arduino IDE
First, add the following URL to the Additional Board Manager URLs:
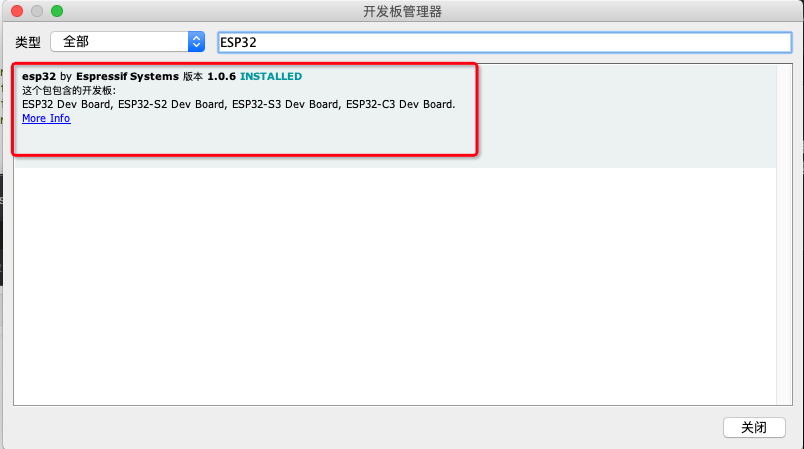
https://raw.githubusercontent.com/espressif/arduino-esp32/gh-pages/package_esp32_dev_index.json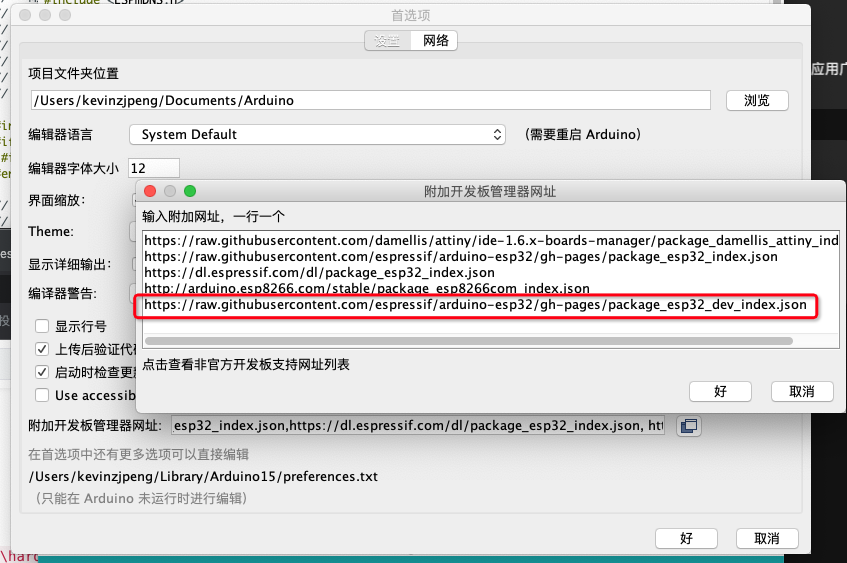 Then search for “ESP32” in the Board Manager to find and install the ESP32 board package with C3 support.